How to get REST API Data in Blazor Grid| Blazor CRUD Operations | Part 2 | Blazor Tutorial
Till now, we have learned how to get Data from your REST API and print that in DOM as HTML Table, like the below sample:
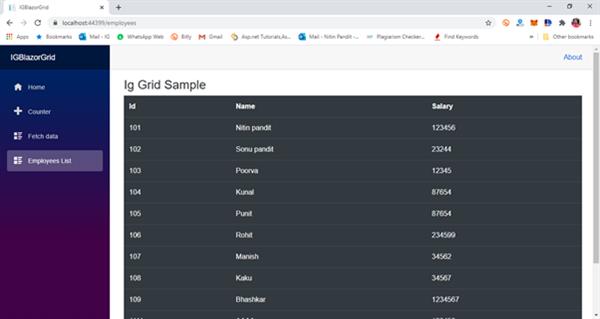
but what if we want this data to filter, Short or search, means what if we want this data to be in a smart data grid?
Here In this article we’ll add a grid from Ignite UI for Blazor in my application from the NuGet package and will check this out with the below steps but before going ahead I would suggest you to read me previous blog for making an HTTP communication in Blazor App:
REST API Communication and CRUD Operations in Blazor
Step 1: Install NuGet Package for IgniteUI.Blazor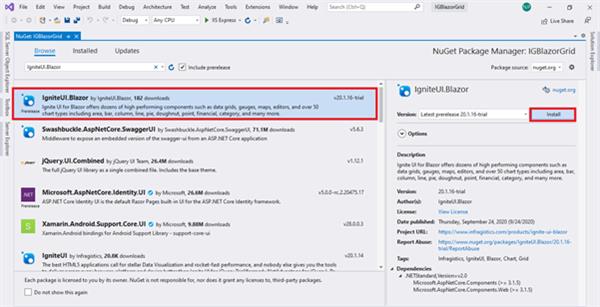
Step 2: Configure Ignite UI for Blazor by adding the required tag in the _Host.cshtml file (For Blazor server project)
<script src="_content/IgniteUI.Blazor/app.bundle.js"></script>
<script src="_framework/blazor.server.js"></script>
Like the below image:
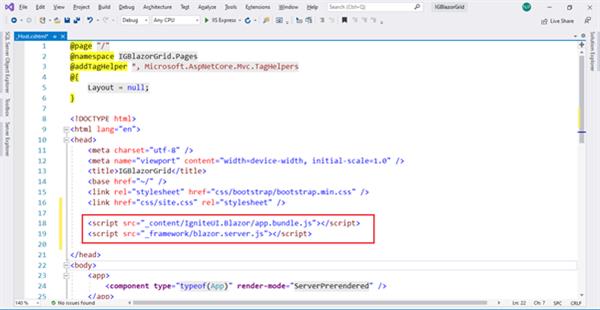
Step 3: Now, use the below-using statements in “_imports.razor” for all the razor components
@using IgniteUI.Blazor.Controls;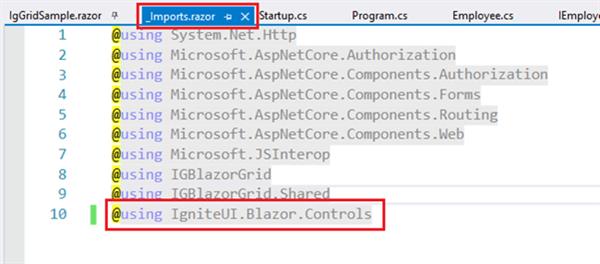
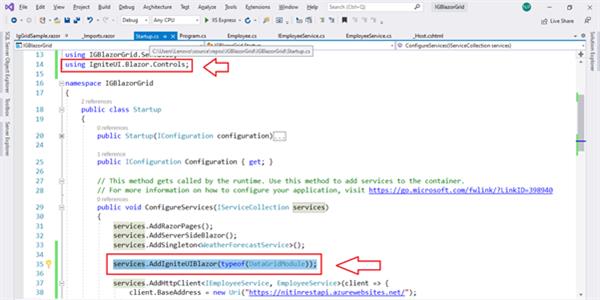
Step 4: Register IgniteUI for Blazor controls in your project’s Start-up file like other services:
services.AddIgniteUIBlazor(typeof(DataGridModule));
Like below:
Step 5: We are done with all configuration settings and now one your razor component where you want to use Ignite UI Data Grid and comment the previous HTML table code and add the below code for using Data Grid in auto-generate columns:
<DataGrid DataSource="@Employees" Height="500px" Width="100%"></DataGrid>
Here in this code spinet, DataSource is mapped with the local variable “Employees” which is having all the JSON data coming from REST API service.
Now run the application and navigate to “/Employees” and I hope you’ll also the beautiful Data Grid will all the default features like Sorting, Filtering, Column hiding, column Pinning: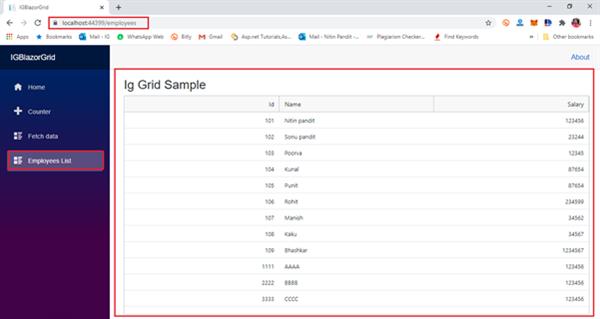
Now, In this Data Grid you have tons of feature to use as default, get your mouse over the column header and click on the three dots:
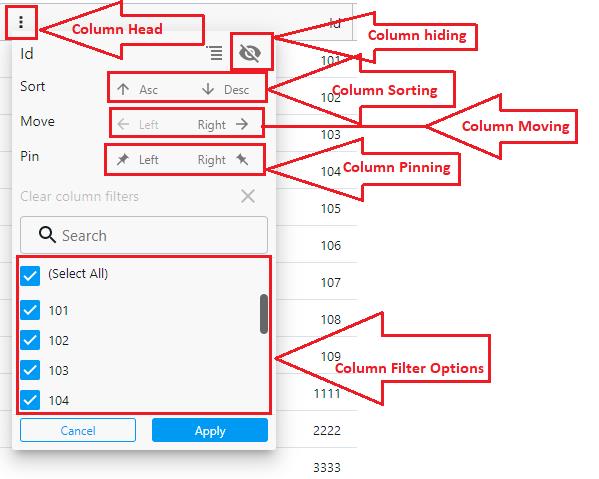
This grid has generated the auto-generated columns but you can edit the columns and can make your own with custom data, for more details I would suggest you check the official document with the below link:
Thanks for reading this article :)


