Power BI Basic Data Transformation Technique
Introduction
When working in a large set of Data, definitely we cannot use the data as it is. We need to perform some refinements so that we can exactly look into the data in which we are interested. In Power BI, this process is called Data Transformation, which can be done in different ways. In this article, we will have a look at the different ways of data transformations.
Different ways of Data Transformations in Power BI
First thing first, in order to perform data transformation, we need to load the data. As for this article, I am going to use SQL Server as my data source and load the data from the table [Sales].[SalesDetails].
SELECT [SalesId]
    ,[ProductName]
    ,[Quantity]
    ,[DateofSale]
FROM [PracticalWorks].[Sales].[SalesDetails]
The above T-SQL Statement results as,

Fig.1 SalesDetails table’s result set
Now we have to load the data from the data source.
Load Data into Power BI from Data Source
Select the SQL Server option from the Home ribbon tool.

Fig.2 Connect to SQL Server Data source
Choose the Database and table(s) and then click the Transform Data button as shown below.

Fig.3 Choose Transform Data option from the Data Source
Now the data will be loaded into a new window which is called the Power Query Editor Window, where we are going to perform most of the data transformations.

Fig.4 Power Query Editor Window
Renaming the Data source name - Queries Session
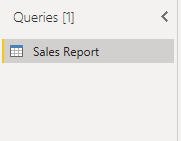
If we look at the left corner of the Power Query Editor window, we can see an option as Queries. Under this session, all the different data sources are listed with the default data source’s file name. i.e. When a SQL table is loaded, then that table’s name is listed in this session, if we load an Excel file, then its file name is shown up.
This may be difficult for us when we have multiple data sources for a single Power BI. We can rename this data source as per our wish. To rename the data source name, just double-click the source and rename it.

Fig.5. Renaming Data sources
Renaming the Columns
By default, the data source’s column name is displayed in the Power BI. But we can rename it if required. One easy way to do this is, double-clicking the column header name which we need to rename and enter the new column name.

Fig.6 Renaming the header column name
Removing Rows & Columns
When working in a larger dataset, definitely we do not need all data. We can refine the data by removing unwanted columns and rows. To perform this in the Power BI query editor, navigate to Choose Columns, Remove Columns, Keep Rows and Remove Rows options under the Home tab. By using these options we can easily remove some unwanted data.

Fig.7 Managing Columns & Rows
Apply Row Filter
The next data transformation is applying filters to the Rows. Pick the row data based on our need by applying the filter. To perform this, choose the column’s down arrow and choose the row values which we are interested in.

Fig. 8 Applying the Row Filter
Remove Duplicate Data
Sometimes there may be a chance of getting duplicate data. In this scenario, it's better to remove those duplicates by clicking the column header and choosing Remove Duplicates

Fig. 9 Removing Duplicates
Change Datatypes
While loading the data from the data source, based on the data value, Power BI will allocate the data type. This may not be accurate which we are looking for. We can change the data type of a column by choosing Icon before the column header name and choosing the accurate data type.

Fig.10 Changing Data Type
Conclusion
In this article, We have discussed some of the basic data transformation methods in Power BI. I assume you all found this article much useful. We will discuss some more concepts in upcoming articles. Please share your feedback in the comment section.
Consider reading other articles,


