


Azure Automation using Powershell
Introduction
In order to run the Azure, we know the web azure portal where we can modify and manage resources as and when needed. But to manage resources on regular basis, logging into the Portal each time is a hectic job. So automation can solve maximum problems for us. For the automation, we write scripts that keep running in order to ensure the valid logic gets executed.
For the Azure to be automated, we need the azure SDKs. Download the SDKs if not added already. To download the SDK, navigate to the Download SDKs.
There are options for various tools and languages supported by Azure up till date like Java, Visual Studio, Node JS, PhP, Python, RUBY, etc.
We are here interested for Powershell command line tools.
Once downloaded, click and follow the installation rules and then the azure contents would work with Windows Powershell.
Once the powershell azure sdk is installed, open the Powershell with administrator rights.
Then, the first thing we need to is Login with azure credentials and connect to Azure. The command is
> Login-AzureRmAccountThis opens up the Microsoft Azure Login window. Add the user name and password and login.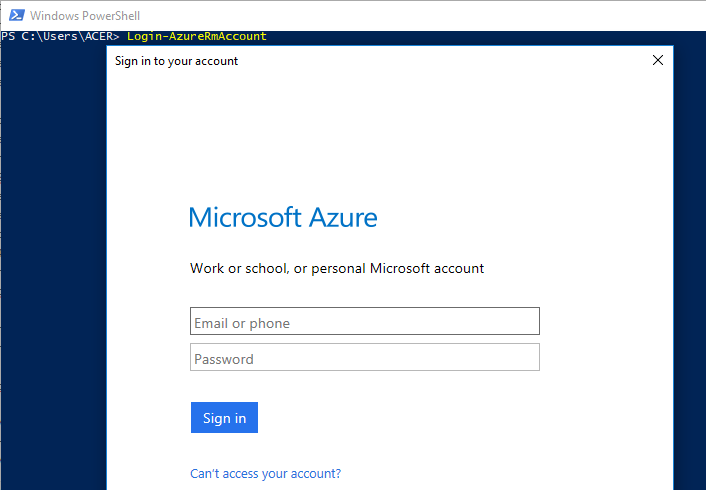
After the login, in the powershell window, we can see the details of the subscription.
Now, if suppose you have multiple subscriptions and want to select a particular subscription, then the below command works out:
//To fetch the subscriptions
 > GetAzureRmSubscription
//To select the particular subscription
 > GetAzureRmSubscription -SubscriptionName SubName | Select-AzureRmSubscription
To get the current subscription details for which we are working on, then the shell script goes like:
 //To get the current context of the azure subscription being used
 > Get-AzureRmContext
The above few syntax have AzureRm. Now the "Rm" here means 'Resource Management'
Getting the list of VMs in the Azure resources under the subscription:
> Get-AzureRmVm //Gets the list of VMs under the subscription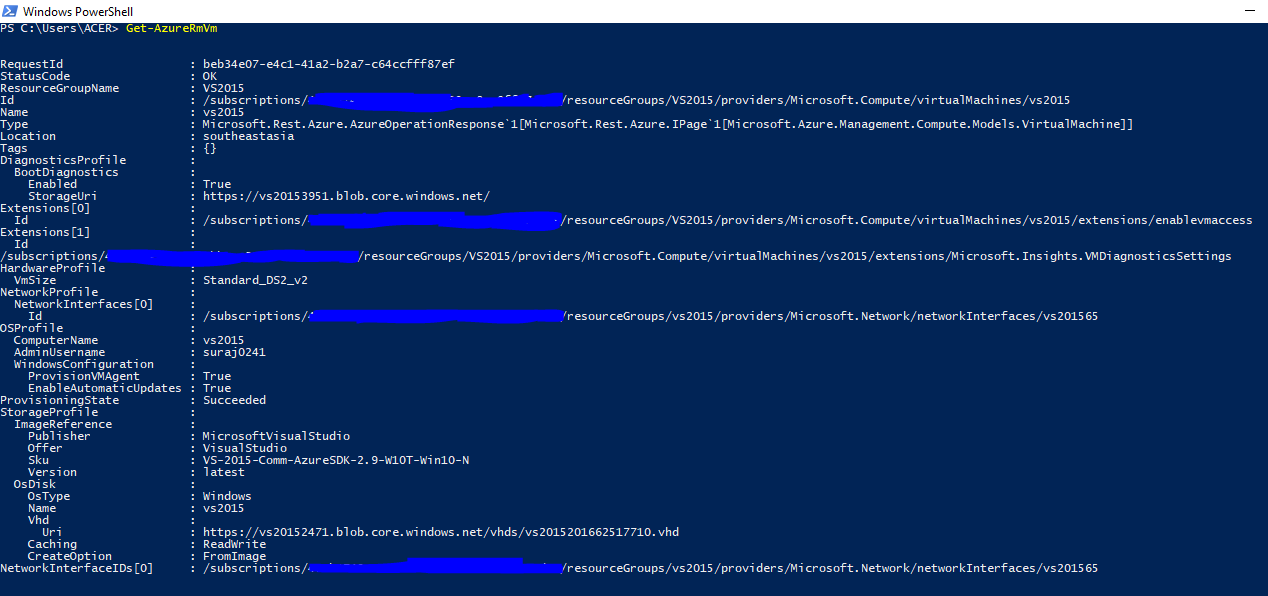
The above image shows, we have a single VM with Resource name "VS2015". There are other information as well like, disk size, type, OS, etc.
Now to stop the Azure VM, we need to have the below running script:
> Stop-AzureRmVm -ResourceGroupName VS2015 -Name VS2015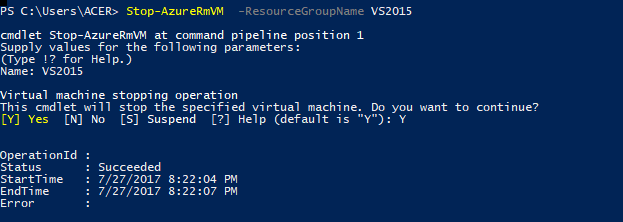
This way we can use the powershell script and connect to Azure in order to use and create Azure services without using the portal. In the upcoming articles we will look into creating other services through Powershell.

CONTRIBUTE
MOBILE APP
